This will explain the circulation of stock items in the library by using the Front Desk Issue and Return menu option
Issues and Returns Screen
There are two ways you can access the Issues and Returns screen. Under the Front Desk menu, or the shortcut at the top of the screen
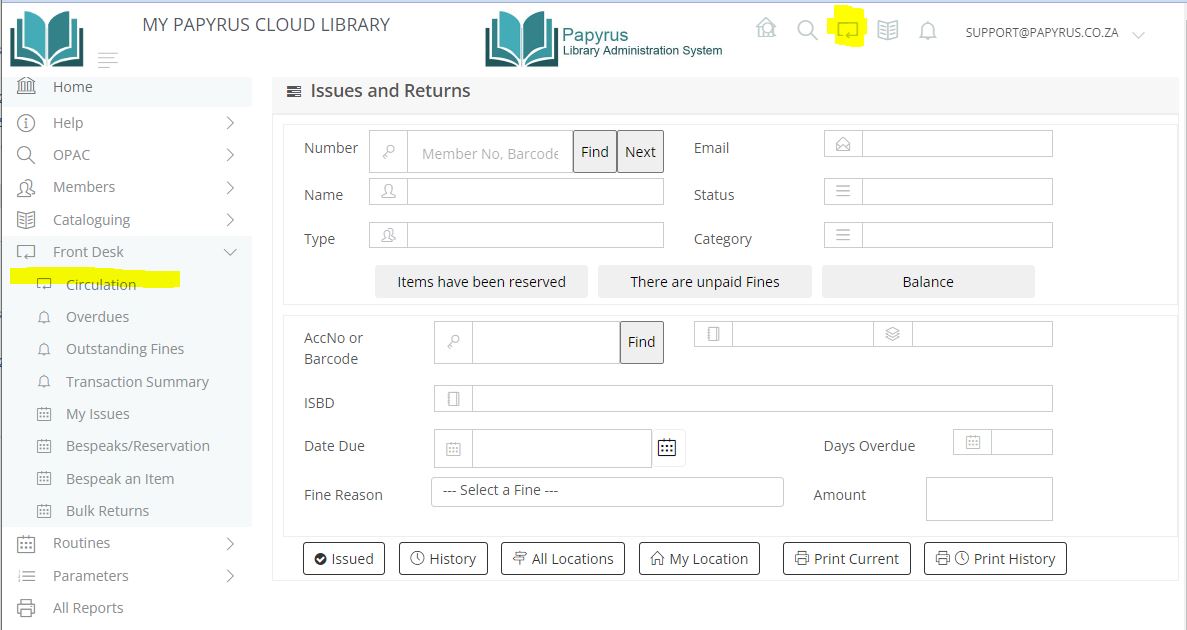
Issuing Stock Items
After you have set up the circulation parameters, you are now ready to issue and return books. This screen is designed to have minimal mouse intervention. Although not necessary, the screen works well with a barcode scanner. The scanner must be set up to scan the barcode and include a Carriage Return, or TAB after the scan so you don't have to use the mouse.
Finding the Member
In order to issue a book you will need to know the member to which you are lending the book. You can either type or scan their member number, their barcode number or type in their name. If you type in their name, you must type at least 3 characters, after which a list of the matching names will be displayed
If the member is found, their details will be displayed in 3 sections. The first their personal information including their member type. If they have items reserved, unpaid fines or a balance on their account, these buttons will be highlighted. The second section is where you will type or scan in the barcode of the item. The third section is a list of the books that they have been issued.
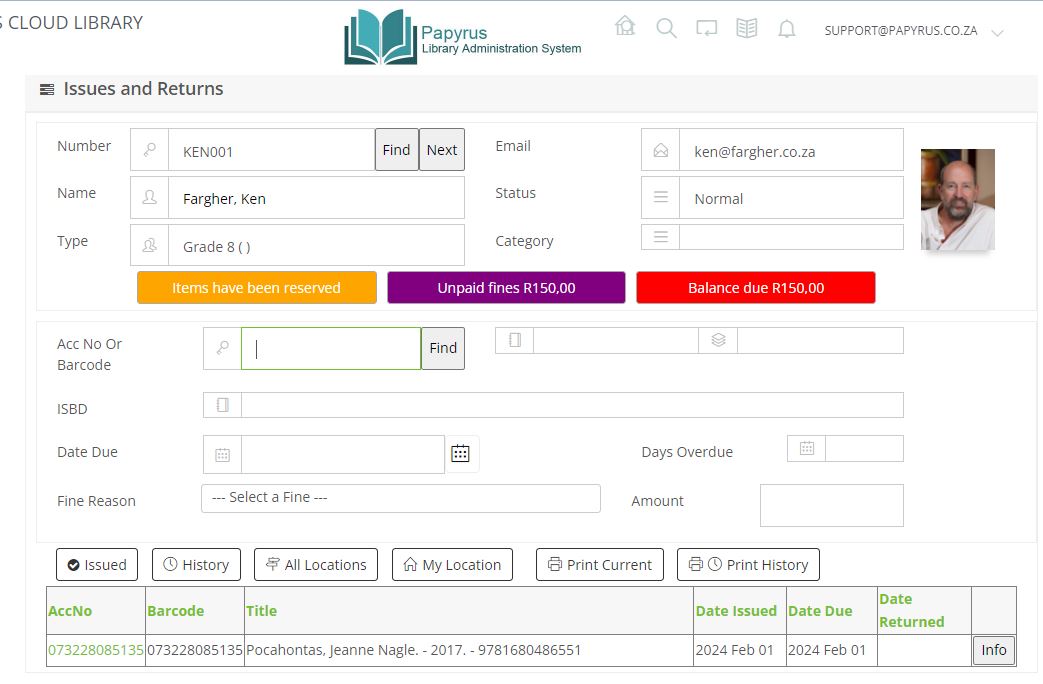
Issuing the item.
The cursor will be waiting for you at the right field so you will not need to use the mouse.
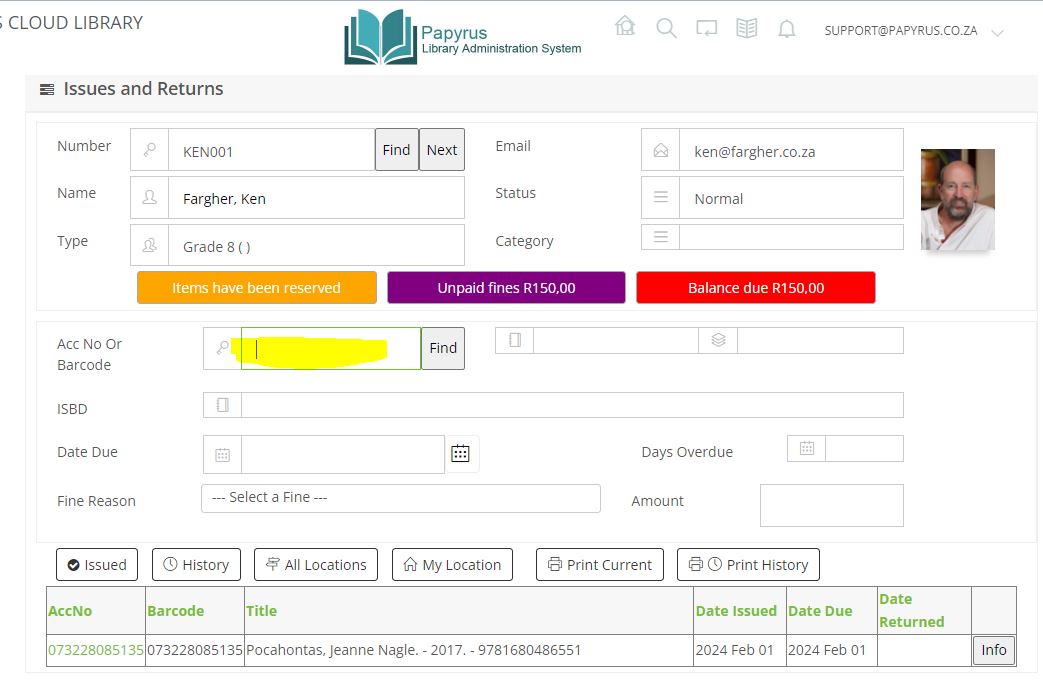
Now type or scan in the barcode number or accession number of the book. If the book is not currently issued, its details will be displayed.
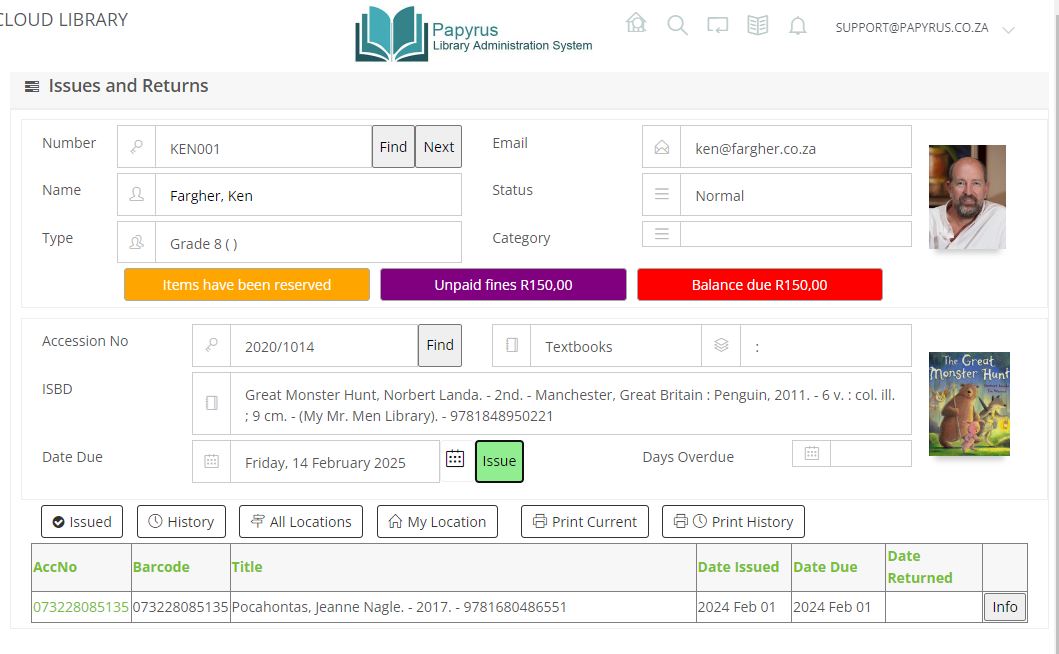
The ISSUE button will be highlighted and will have focus. The publication type and date due will be displayed. All you need to do is press the ENTER key. You may change the due date if you wish before you issue the book. The book will now be issued and added to the list of books issued to this member.
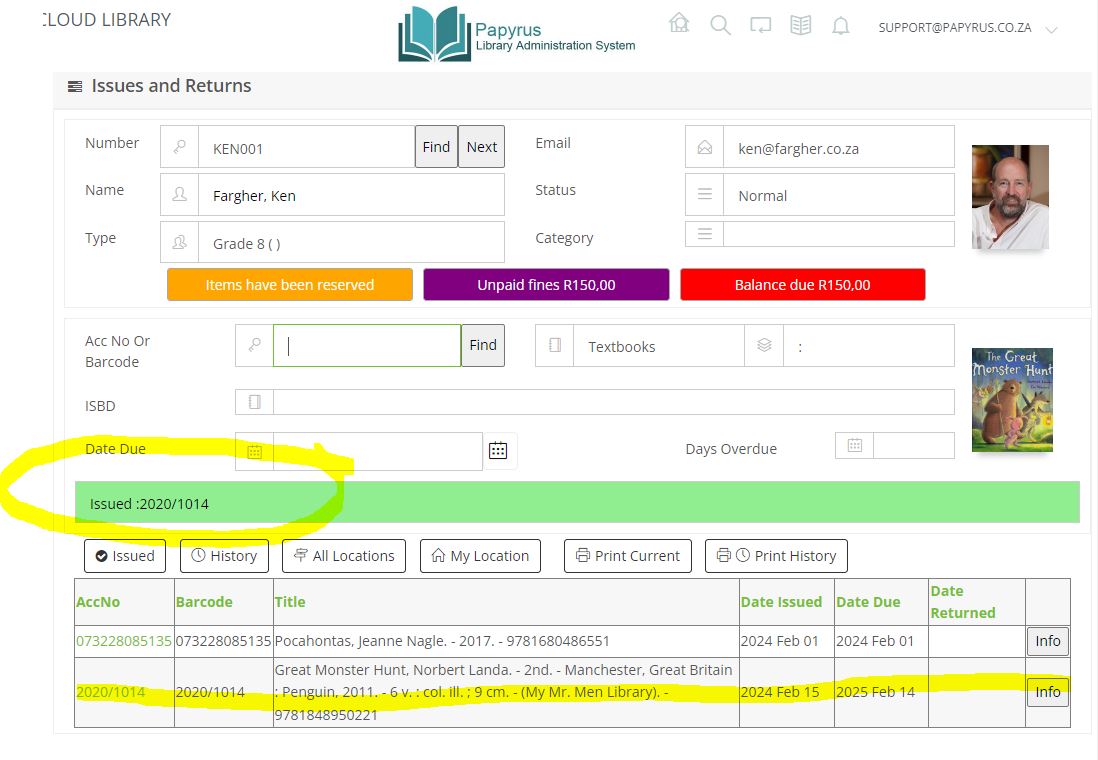
Issuing the next item.
If there are more items to be issued to the same member, the cursor will be waiting for the next barcode. Just type or scan in the barcode and repeat the process. If you are issuing to the next member, click the Next button or use the keyboard shortcut ALT-N
Returning item.
If you are returning items, it is not necessary to know the member who is returning it. You can type or scan in the barcode of the book at the top of the screen. If the item has been issued, the details of the member will be displayed together with details of the book.
Details of the due date are displayed together with how many days overdue it is and if there is a fine.
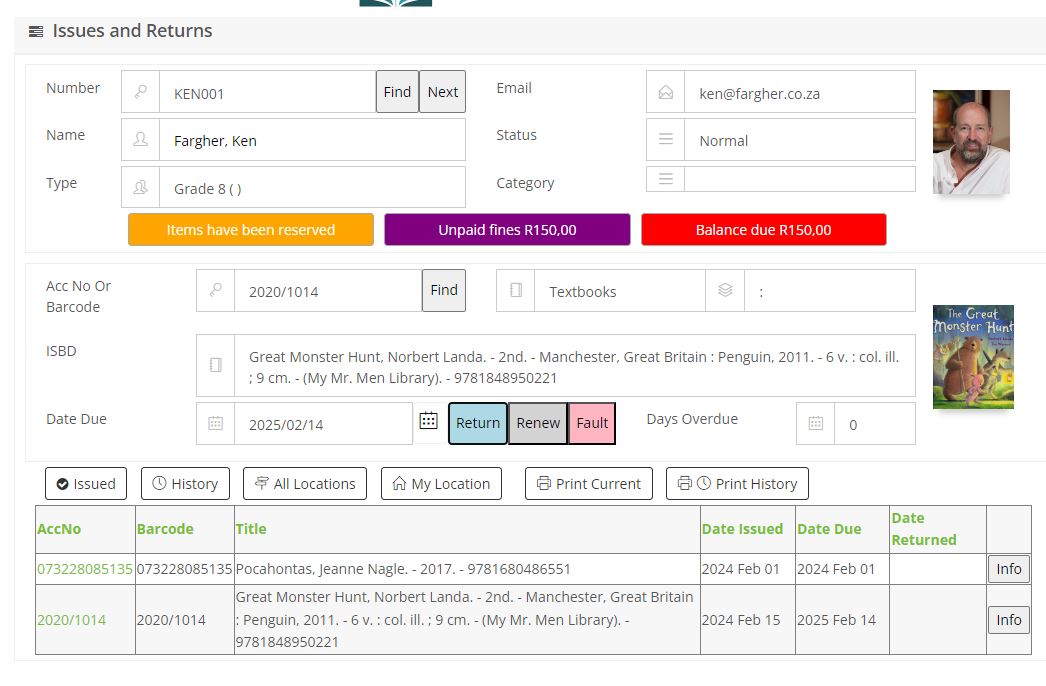
The RETURN button will be highlighted and will have focus. All you need to do is press the ENTER key to confirm your action.
You can also RENEW the book and also select a FAULT, giving you various options of why the returned book is faulty.
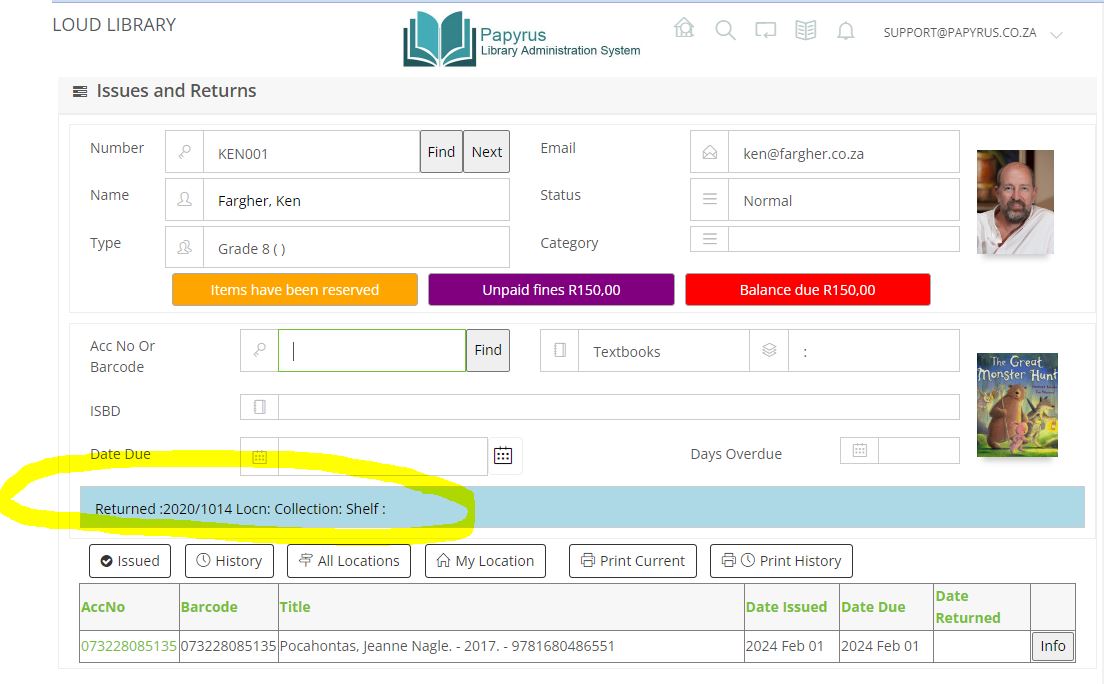
Returning All items.
There is an option to return all items. This is enabled by USER of the library. Make sure the Renew All Items is enabled for the user otherwise the Renew All button will not appear.
Maintain Users
Once selected, the Renew All will take each stock item, return it and calculate any fine that may be due and add it to the members account. It will then reissue the book based on the Renew days under the Member and Publication Type Privileges.
Maintain Privileges
If the Due Date on the Front Desk screen is changed prior to renewing all the items, this date will be used to set the Due Date for all the items and the Renew privileges will be ignored.