Quick Start Guide
Get up and running with Papyrus Cloud in three easy steps
Understanding the Main Screen
After logging in, the Papyrus Cloud main screen is displayed. The Menu Bar at the top provides access to all major functions of the system. Below the menu, a summary panel shows live counts of members, books, stock items, and items currently on issue — a useful at-a-glance view of your library's activity.
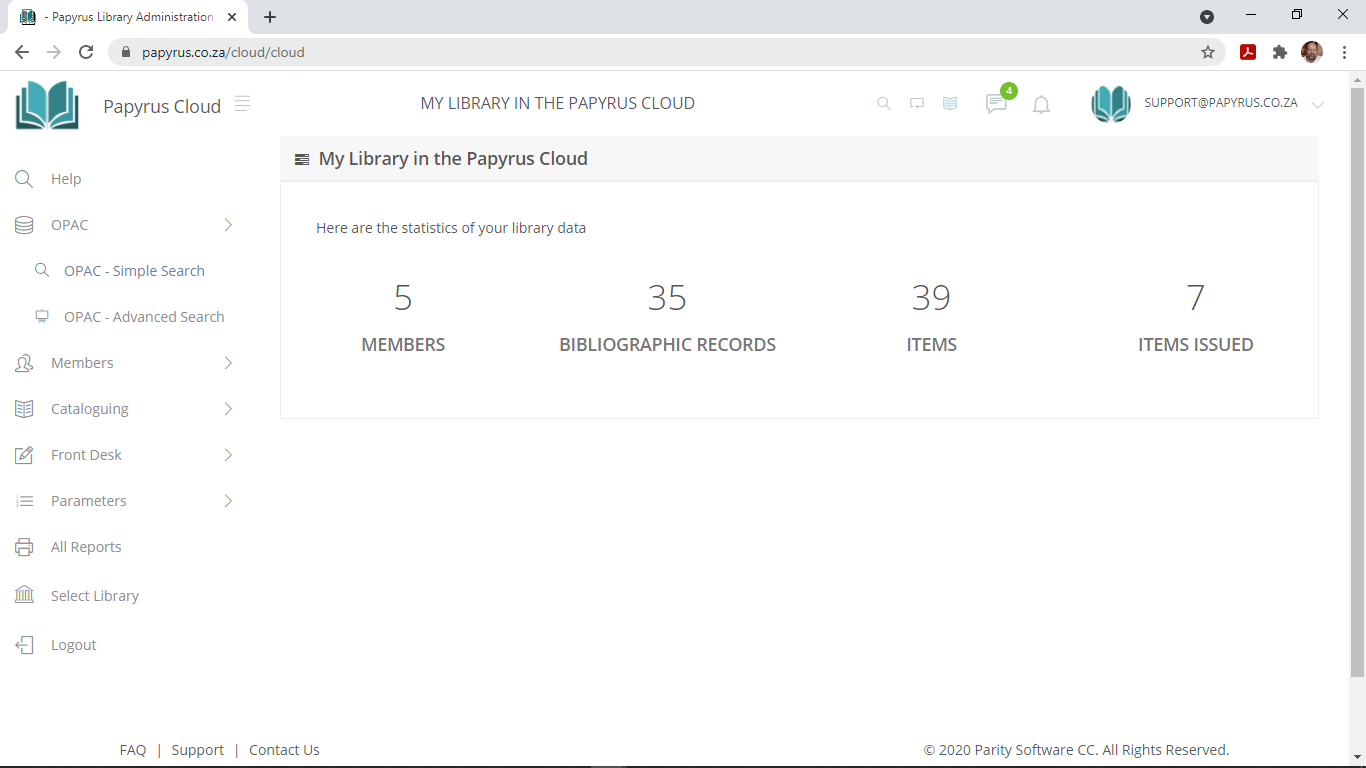
The menu bar items used in this guide are described below. The remaining menu items are covered in the full reference documentation.
Adding a New Library Member
Library members are the people who borrow books and other materials. Every member is uniquely identified by a Member Number. This number is used throughout the system to look up, issue to, and report on a member's activity.
To open the Members screen, click Members in the menu bar, or open it directly in a new tab.
Step 1 – Open the new member form
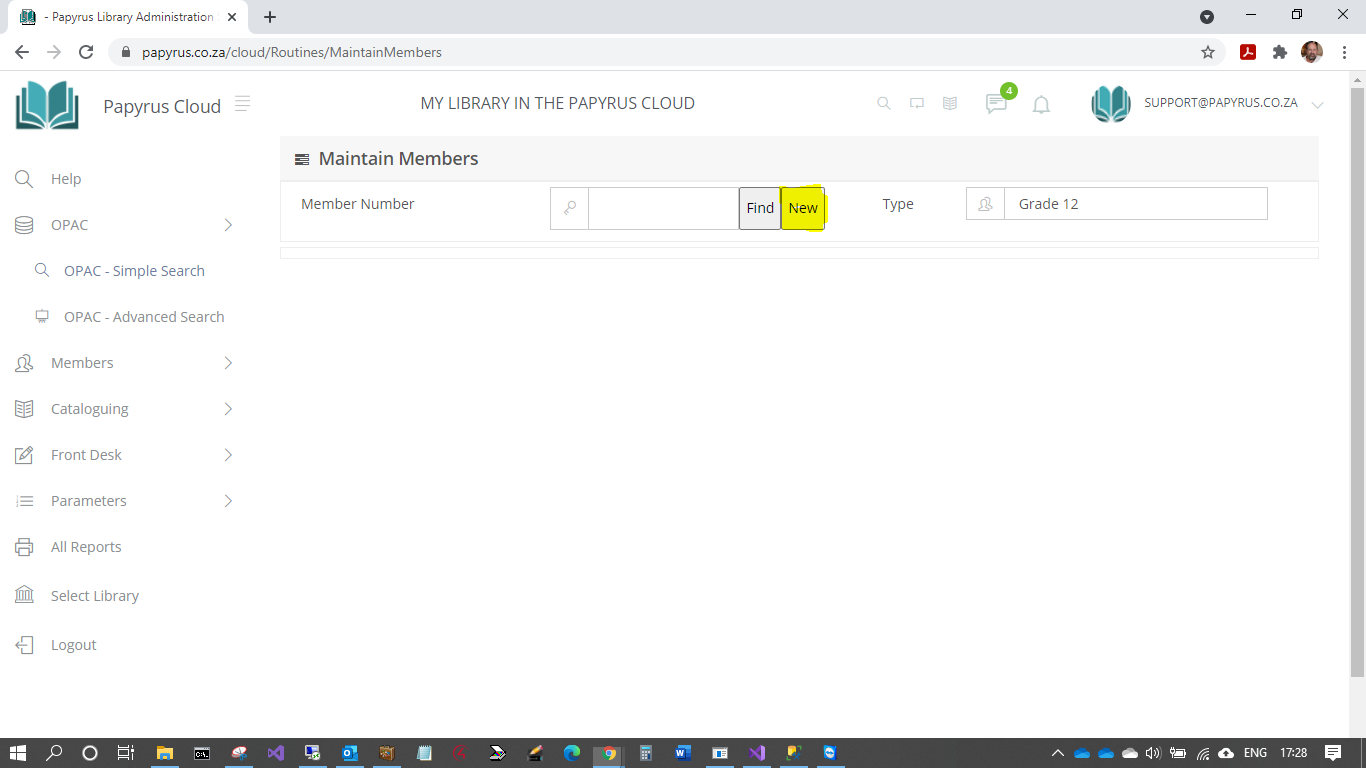
The Members screen opens with a prompt to enter or search for a member number. Since we are creating a new member, click the New button. A popup form will appear.
Step 2 – Assign a member number
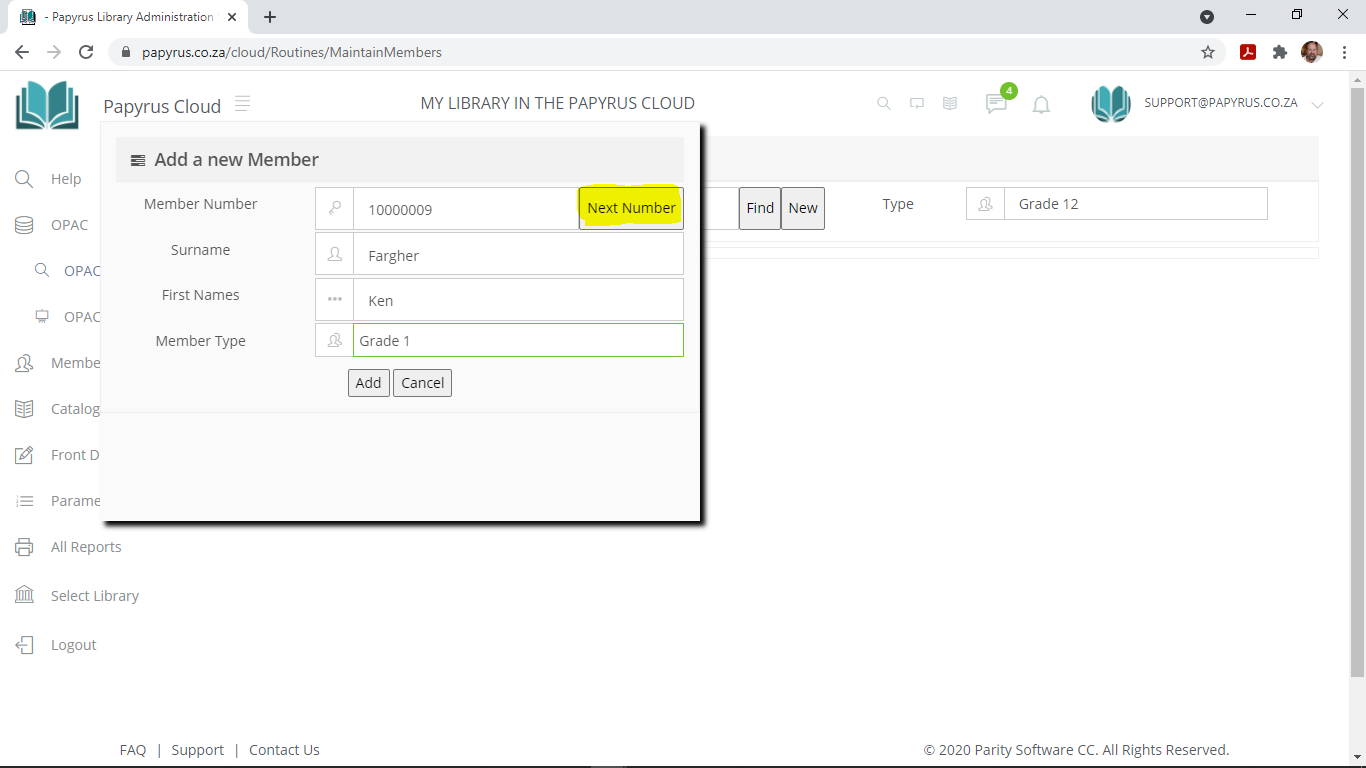
The new member form opens. Click the Next Member button to automatically generate the next available member number based on the sequence configured in Global Parameters. You may use this number or type in a different one if your library uses a specific numbering scheme.
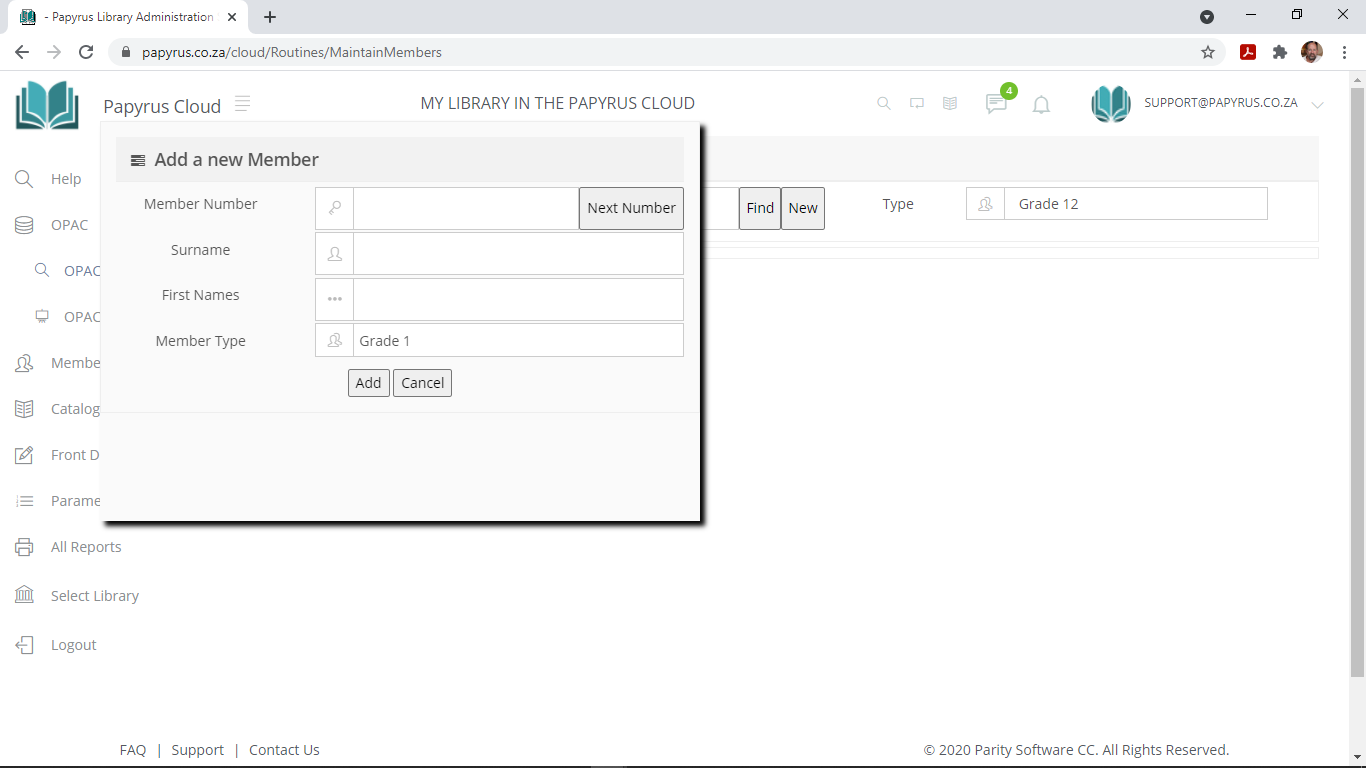
Enter the member's Surname and First Names, then select the appropriate Member Type from the drop-down list. Click Add to create the record and proceed to the full details screen.
Step 3 – Complete the member's details
The full member record is divided into two areas. The Basic Details panel on the left contains the most commonly used fields. A set of tabs on the right provides access to additional information such as contact details, custom fields, and borrowing history.

At a minimum, complete the following fields:
| Field | Notes |
|---|---|
| Surname | Required. Used for searching and reports. |
| First Names | Required. Enter all given names. |
| Member Type | Required. Controls borrowing rules and loan periods. Defaults to the type set in Global Parameters. |
| Email Address | Recommended. Used for overdue notices and other automated communications. |
Click Update to save your changes.
Cataloguing a New Book
Papyrus stores publication details as Bibliographic Records. Each record describes a title — a book, AV material, website, poster, or other type of media — and is uniquely identified by a BRN (Bibliographic Reference Number). The BRN is an internal identifier used by Papyrus and is separate from the physical accession number or barcode of a copy.
Choosing a cataloguing method
Papyrus provides four cataloguing methods. All four produce compatible records and can be used interchangeably.
This guide uses EasyCAT. To open it, click Cataloguing then EasyCAT in the menu, or open EasyCAT directly in a new tab.

Step 1 – Create a new bibliographic record
Click the Add button. A dialog will appear asking for the title or ISBN of the book you are cataloguing.
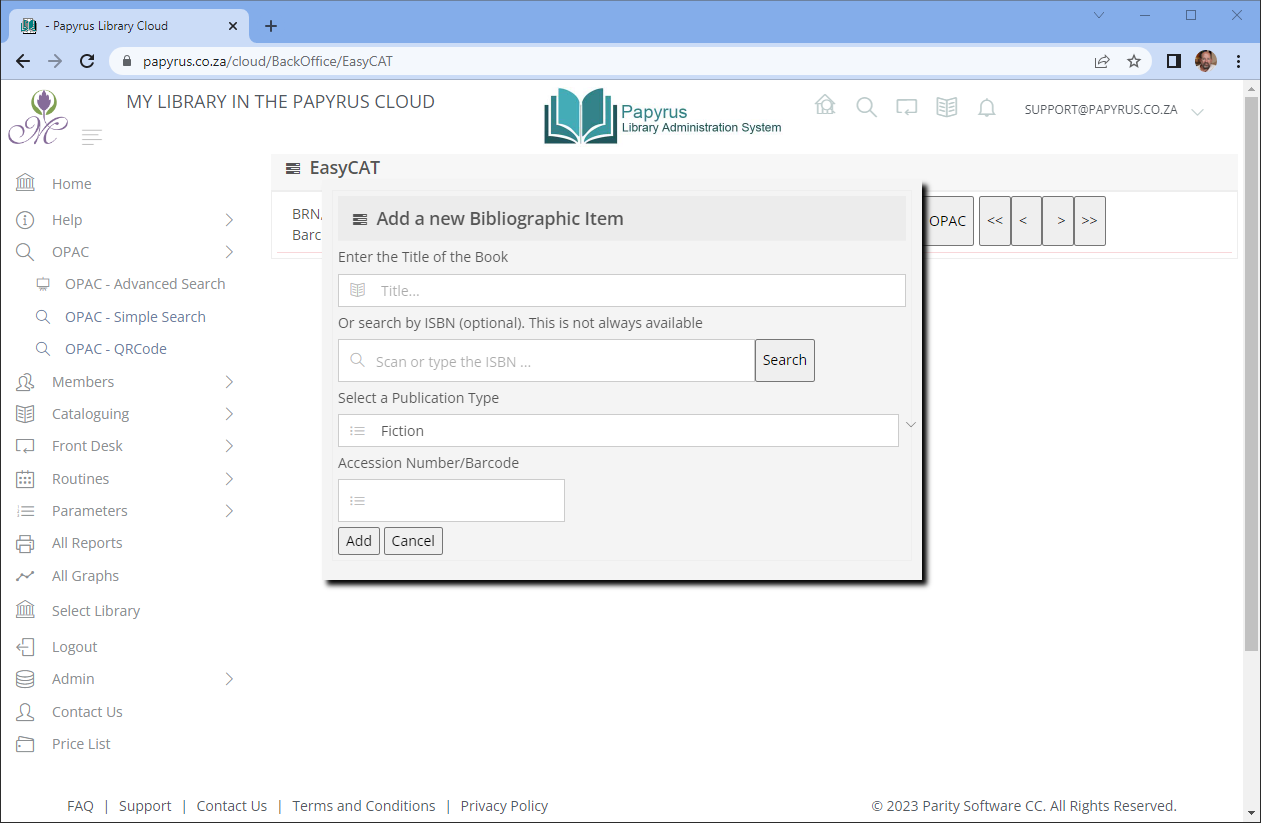
You have two options at this point:
Use the ISBN — Type or scan the book's ISBN number into the ISBN field, then click Search. If the publisher has registered the title in the Papyrus database, the title and other bibliographic details will be retrieved automatically. This is the quickest approach for recently published titles.
Enter the title manually — If the ISBN is not found, or the book has no ISBN, type the title directly into the Title field and proceed. You will complete the remaining details on the cataloguing screen.
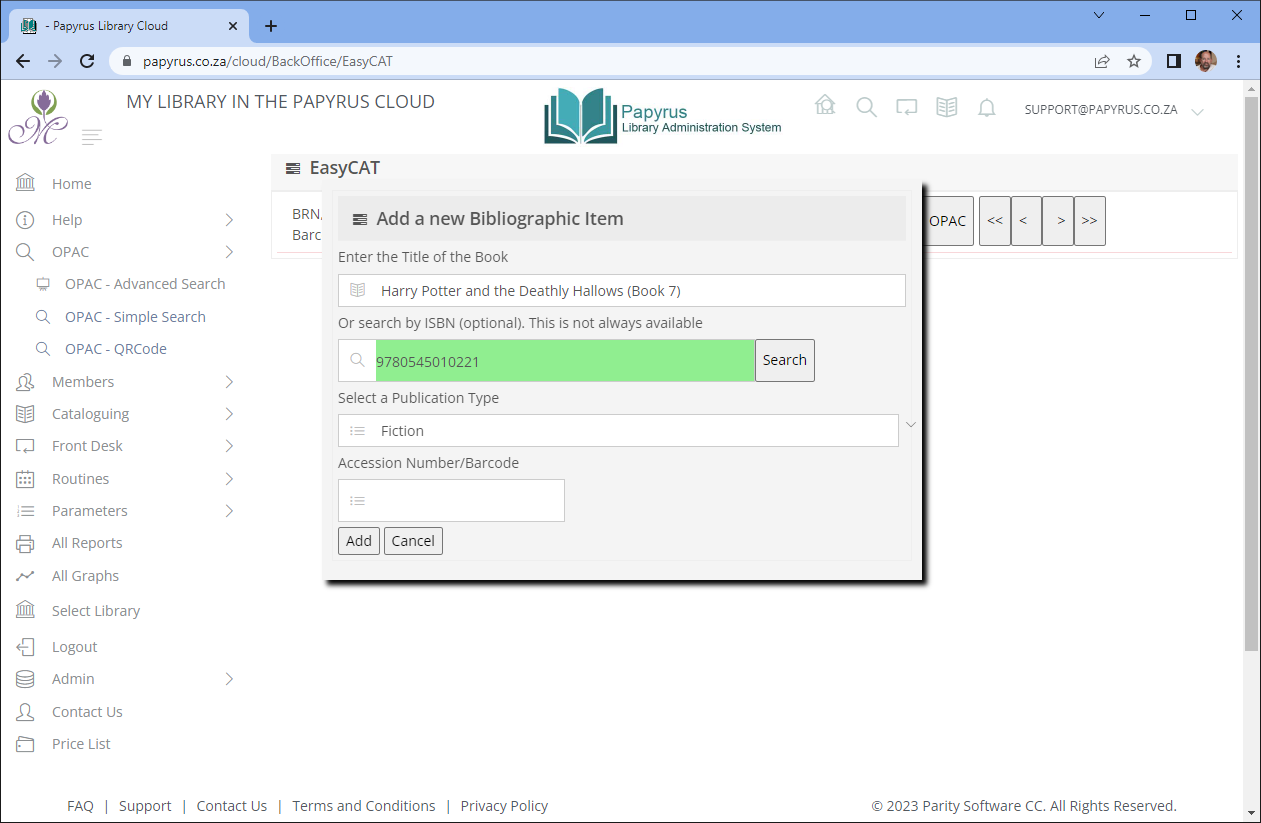
Select the publication type (for example, Fiction or Non-Fiction). If you wish to assign your own barcode at this point, enter it in the barcode field — it must be unique across the entire system. Then click Add.
Step 2 – Complete the cataloguing fields
The EasyCAT cataloguing screen is created with the new BRN assigned and the title pre-filled. The screen is divided into two collapsible sections: the Bibliographic Record at the top, and Stock Details below it.
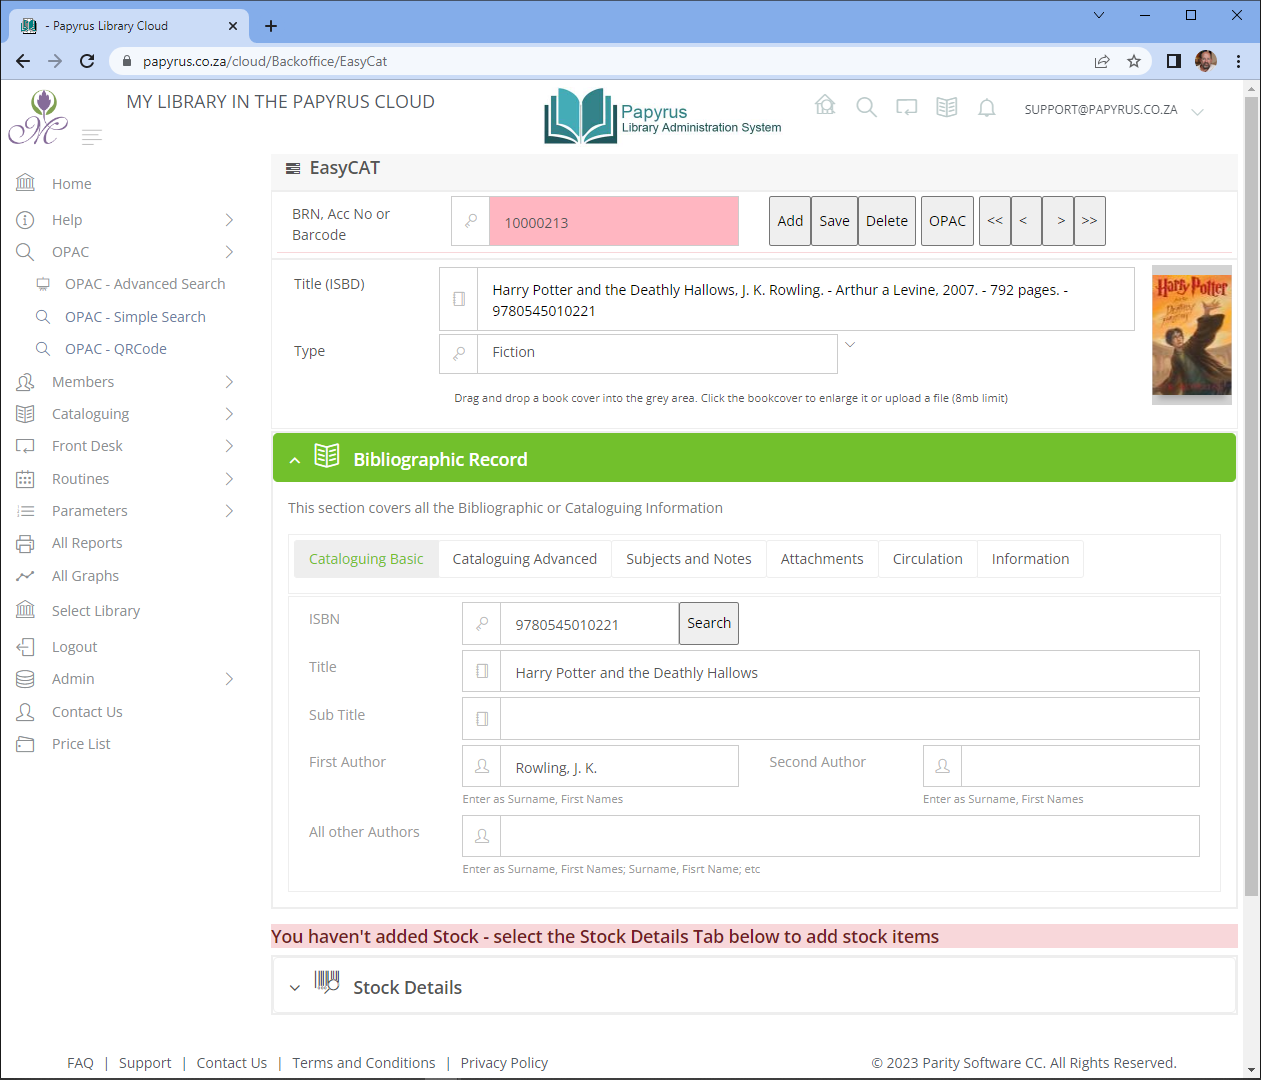
If the ISBN was used to find the book, the fields will have been partially populated. Review and complete any remaining fields as needed. The only field that is strictly required is Title. All other fields are optional but improve searchability and reporting.
When you have completed the bibliographic fields, click Save. This saves the record and generates the ISBD (International Standard Bibliographic Description) display string.
Adding Stock (Physical Copies)
A bibliographic record describes a title. Stock items represent the individual physical copies held by your library. If you have three copies of the same book, you will create three stock items under a single bibliographic record — saving you from duplicating the cataloguing work.
Each stock item is uniquely identified by two numbers:
| Number | Description |
|---|---|
| Accession Number | A unique identifier assigned to each physical copy. Cannot be changed once set, as it forms part of the audit trail. |
| Barcode Number | The scannable number on the book's barcode label. Defaults to the accession number but can be changed if required. |
The stock entry area is located at the bottom of the EasyCAT screen in the Stock Collection section.
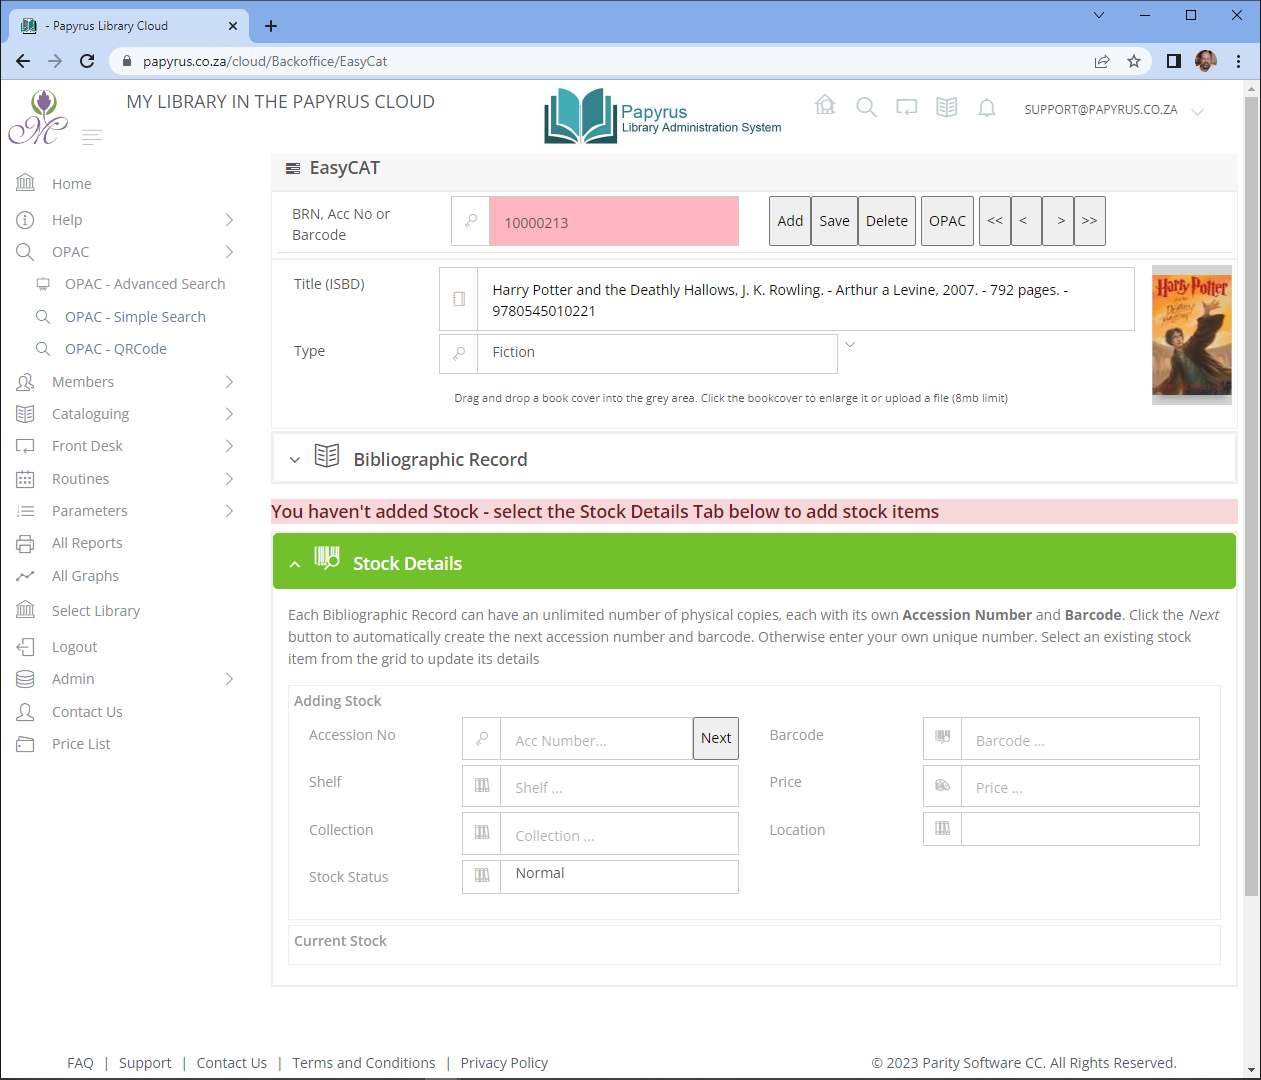
Step 1 – Assign an accession number
Either type your own accession number into the field, or click Generate to have Papyrus automatically assign the next sequential number. After generating, the cursor moves to the Barcode Number field, which is pre-filled with the same value. The barcode field will be highlighted and ready for keyboard input or barcode scanner entry.
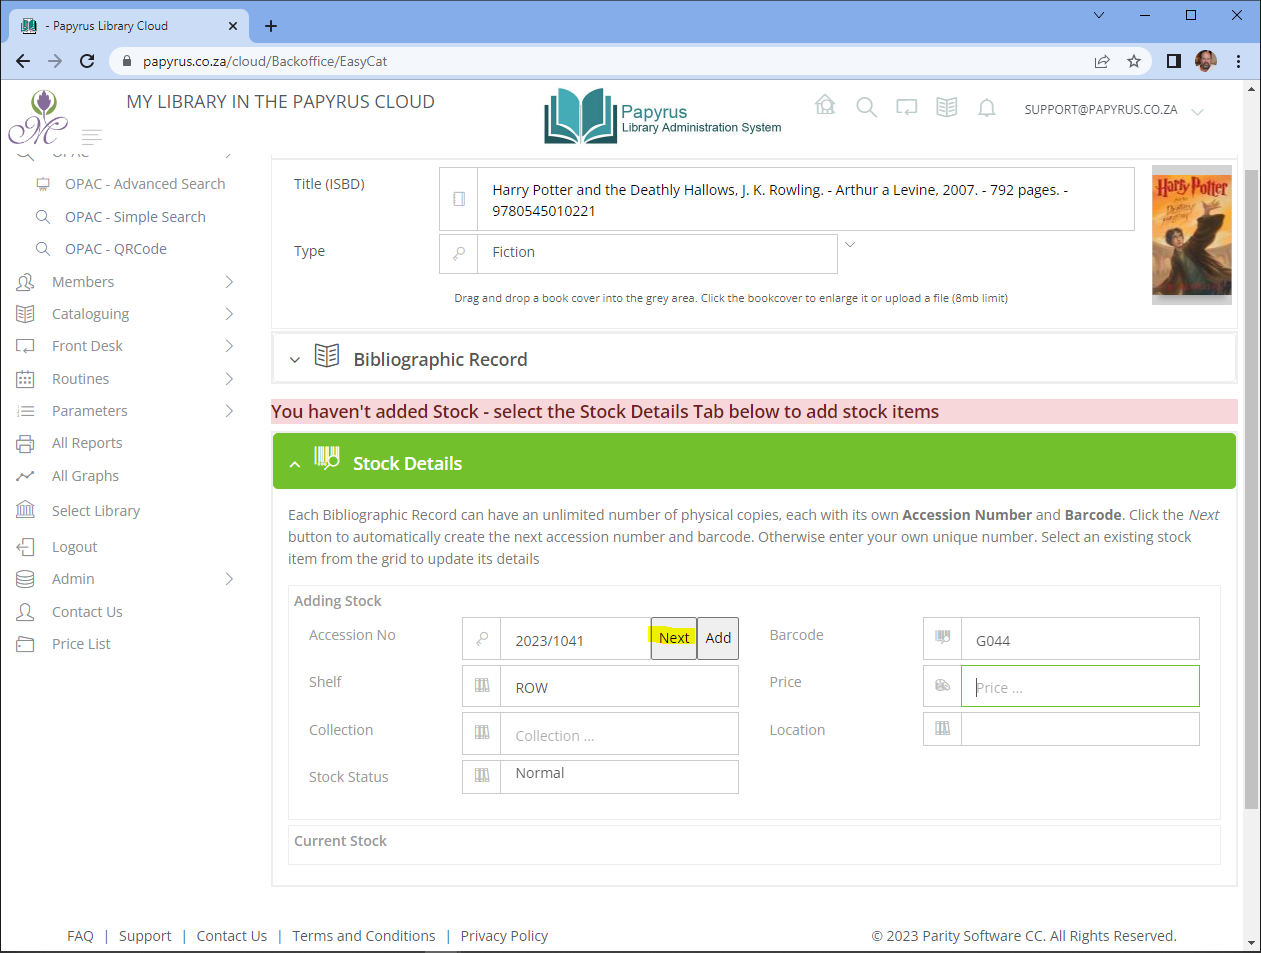
Step 2 – Enter shelf and collection details
Enter the Shelf location of the copy. This tells staff and members where to find the item in the library. Common formats include:
- First three letters of the author's surname — e.g. SMI, MAR, BRO
- Dewey Decimal Classification code — e.g. 640.73, 3297.092 SHE
- Section prefix — e.g. REF 330.942 CON
The optional Collection and Location fields can be used to group items further:
| Field | Description |
|---|---|
| Collection | Groups items that belong together, e.g. REF (Reference), SERIALS, NF (Non-Fiction), SENIOR. |
| Location | The highest-level physical grouping, for use in multi-site libraries. Leave blank if your library has a single building. Requires a multi-site licence. |
Step 3 – Save the stock item
Click Add. The copy will appear in the Current Stock table below the form.
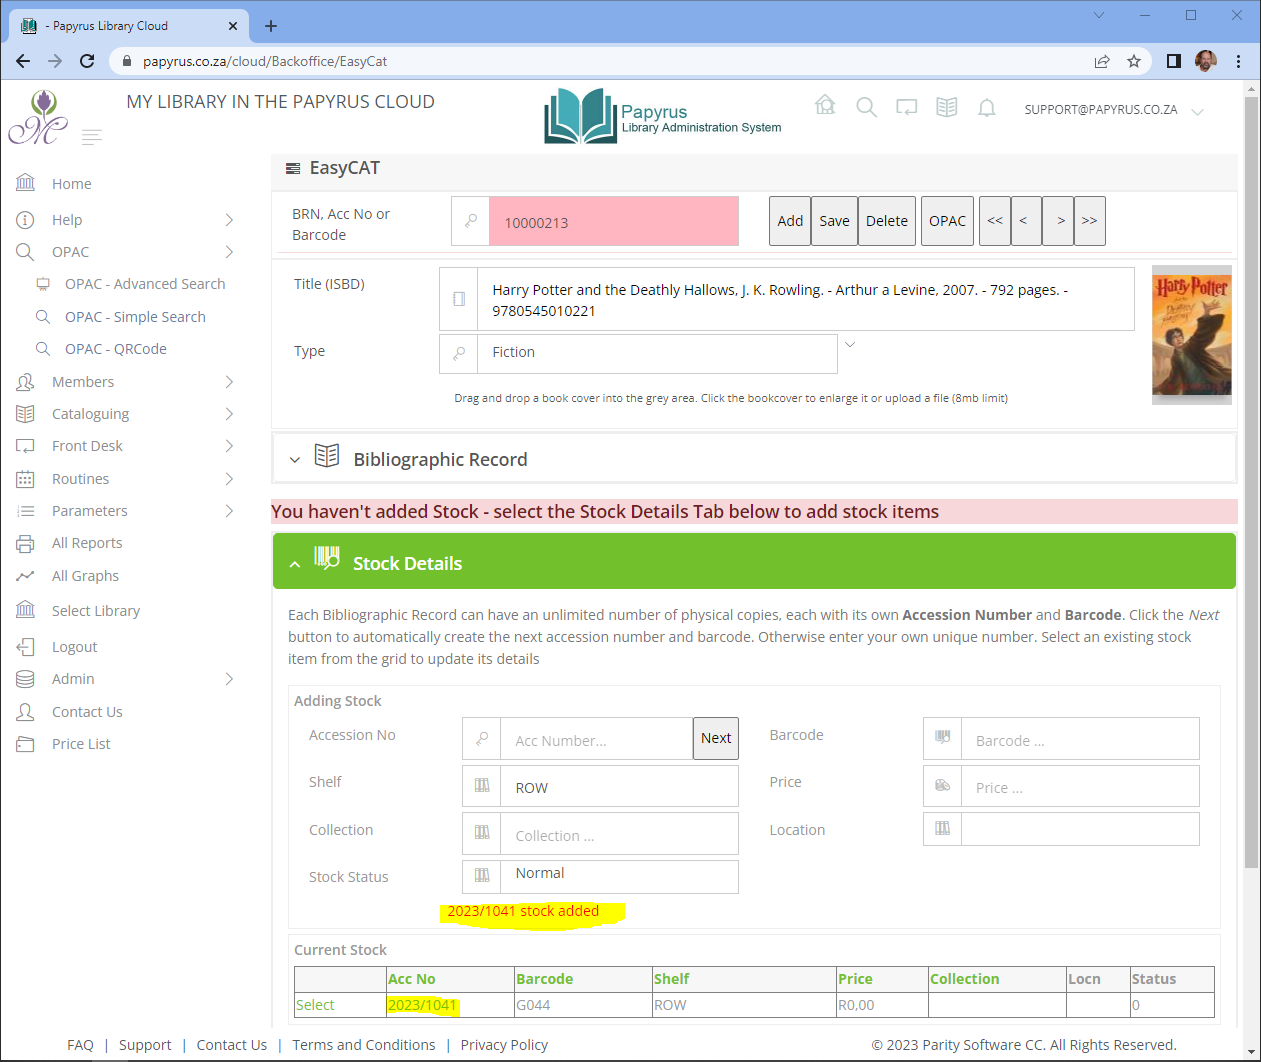
To add further copies of the same title, repeat steps 1 to 3 for each additional copy. Each will receive its own accession number and barcode.
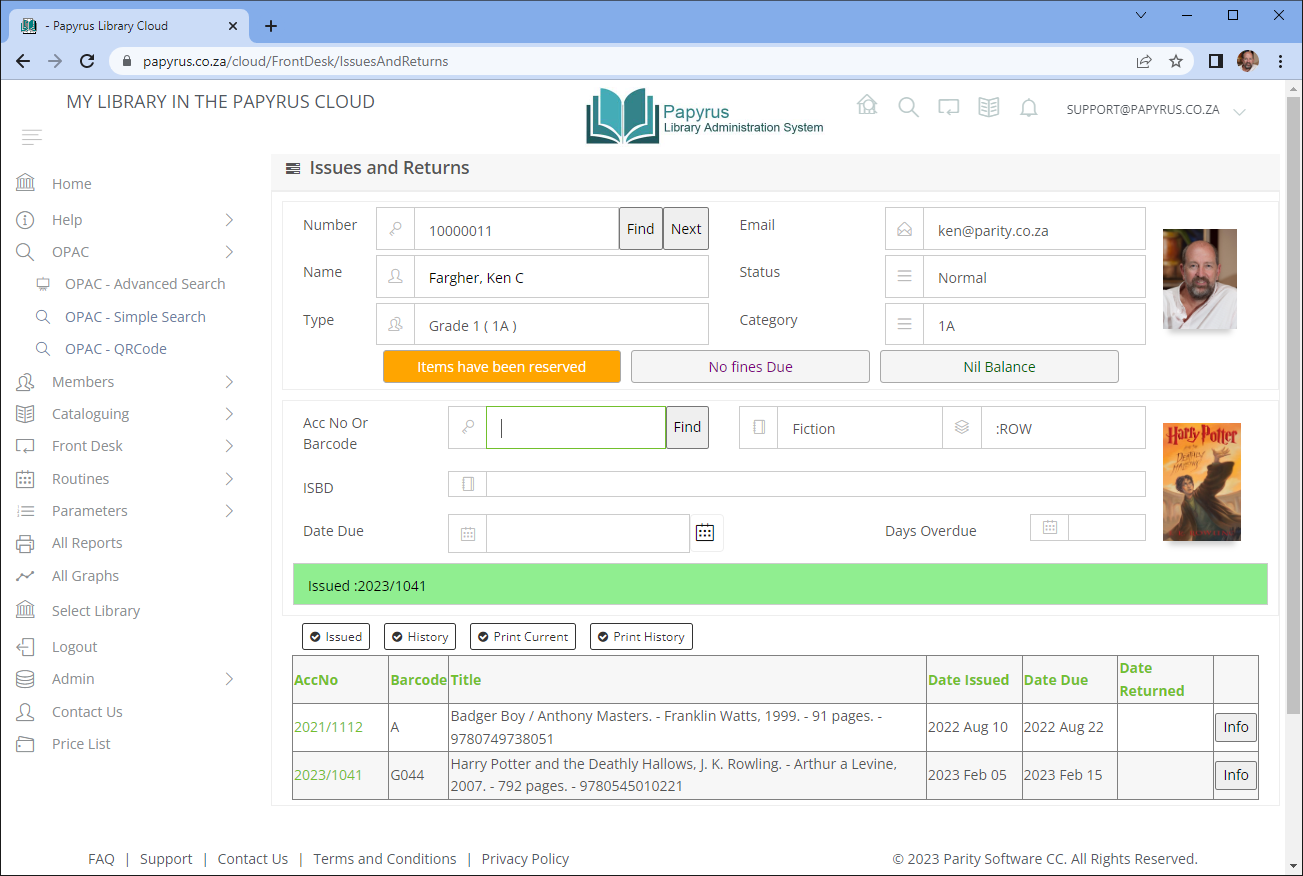
Issuing and Returning a Book
The Front Desk screen is where all day-to-day circulation takes place — issuing books to members, processing returns, and calculating overdue fines. Both issuing and returning are handled from the same screen.
To open the Front Desk, click Front Desk then Circulation Screen in the menu, or open the circulation screen directly in a new tab.
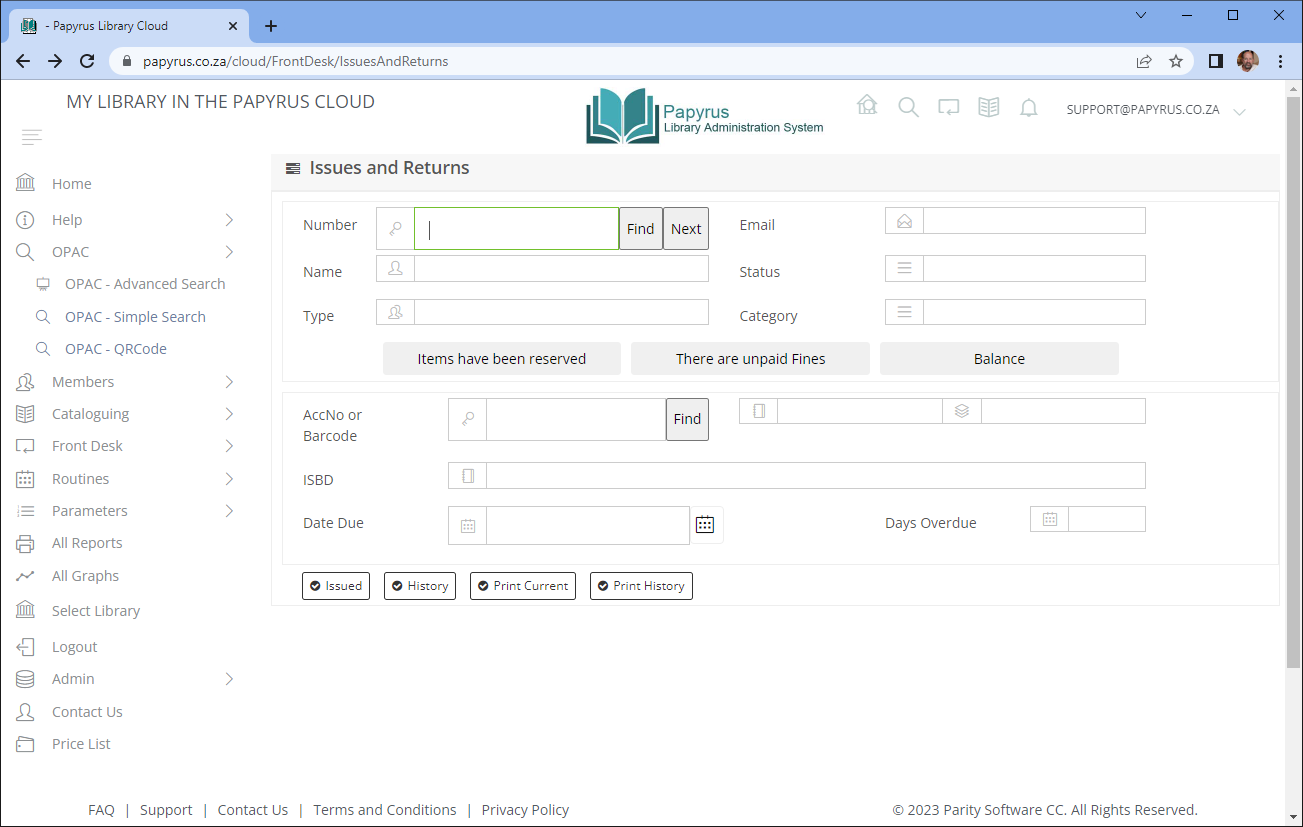
Step 1 – Select the member
The cursor is positioned in the Member Number field. There are three ways to select a member:
Type the member number and press Tab or Enter. The member's details will be displayed if the number is valid.
Scan the member's library card using a barcode scanner. The scanner will read the member number and automatically advance the cursor.
Click the Find button to search for a member by name or other details.

Once the correct member is selected, their name, member type, and any current loans are displayed on screen.
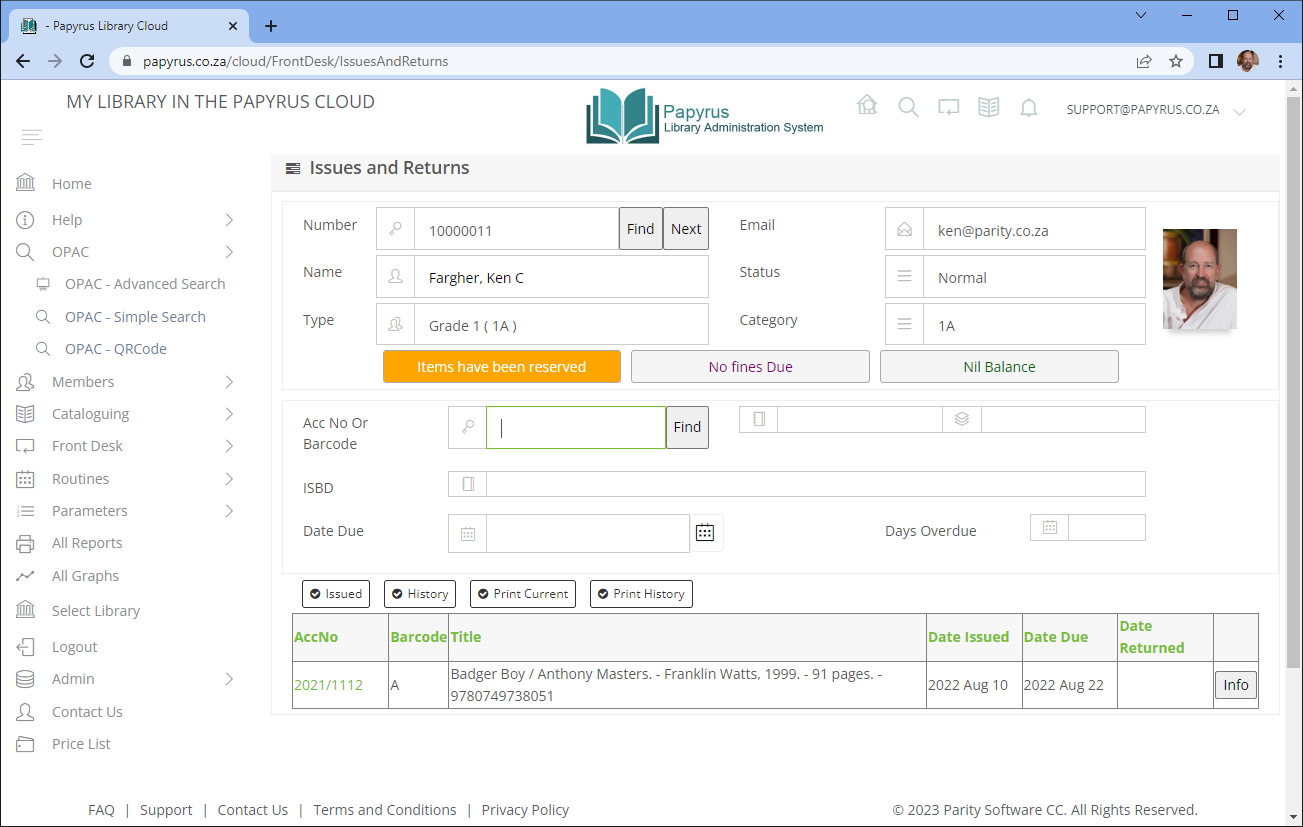
Step 2 – Select the stock item
The cursor moves to the AccNo or Barcode field. Enter the accession number or barcode of the book, then press Tab or Enter, or scan the book's barcode. The bibliographic details of the item will be displayed for confirmation.

Step 3 – Issue the book
The Issue button becomes active and is highlighted in green. The Return Date is calculated automatically based on the loan period configured for the member's type in system Parameters.
Press Tab or Enter, or click the Issue button. The book is issued and the transaction is added to the list of items currently on loan to that member.
Returning the book
Returns are processed on the same Front Desk screen. Enter or scan the accession number or barcode of the book being returned, then press Tab or Enter.
The Return button becomes active and is highlighted in blue. If the book is overdue, a Fine amount is calculated and displayed automatically based on the fine schedule in Parameters.
Press Tab or Enter, or click the Return button. The loan is closed and the item is removed from the member's current loans list.
