This quick start guide will help you perform the three main functions of Papyrus - Adding a Member, cataloguing a book, issuing the book to the member.
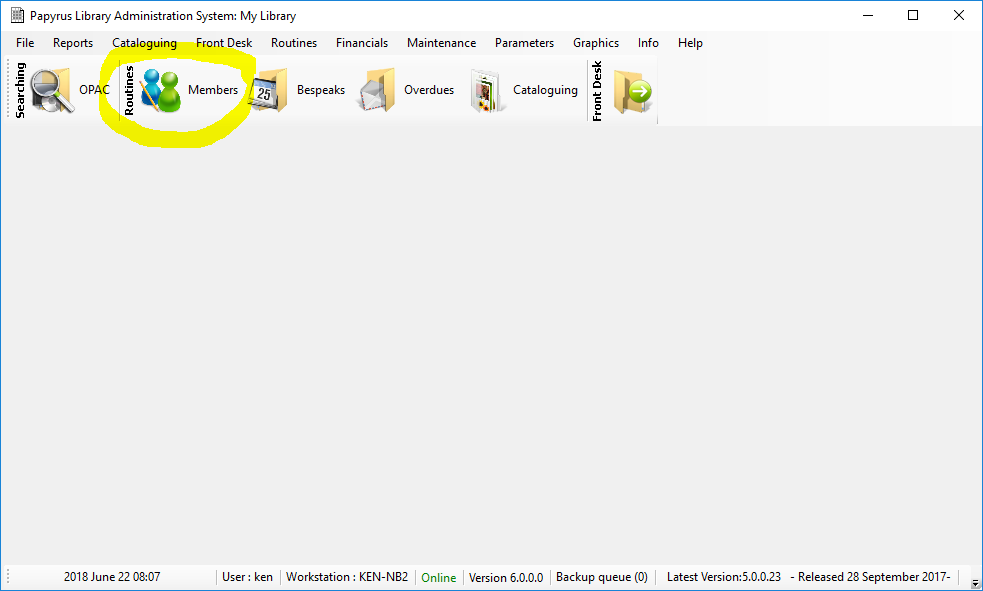
Papyrus has the six main functions along the Ribbon Bar. Above these are the menus which contain all the functions of Papyrus. We will look at Members, Cataloguing and Front Desk
The Papyrus Main screen is divided into a Menu Bar at the top of the screen and a Tool Strip with six buttons just below. On the bottom Status Bar, the Date, Time, User, Workstation are displayed. If Papyrus is in contact with the Papyrus Cloud server, it will display Online. The Version is also displayed followed by the Backup Queue to the Papyrus Cloud and the Latest version of the software
OPAC
This is is for searching the catalog
Members
Used for Adding, updating and deleting library members
Bespeaks
Used for reserving or ordering books for a member
Overdues
A screen for managing overdue items
Cataloguing
Books and other publications are Cataloged and accessioned using EasyCAT
Front Desk
Circulation of publication items, books and stock to Members
The Members of the Library are those people who use the library to take out books.
In this step, we will see how we add a new member into Papyrus. Member's are uniquely identified by Member Number.
Start by clicking the Members tool bar button on the Main Screen.
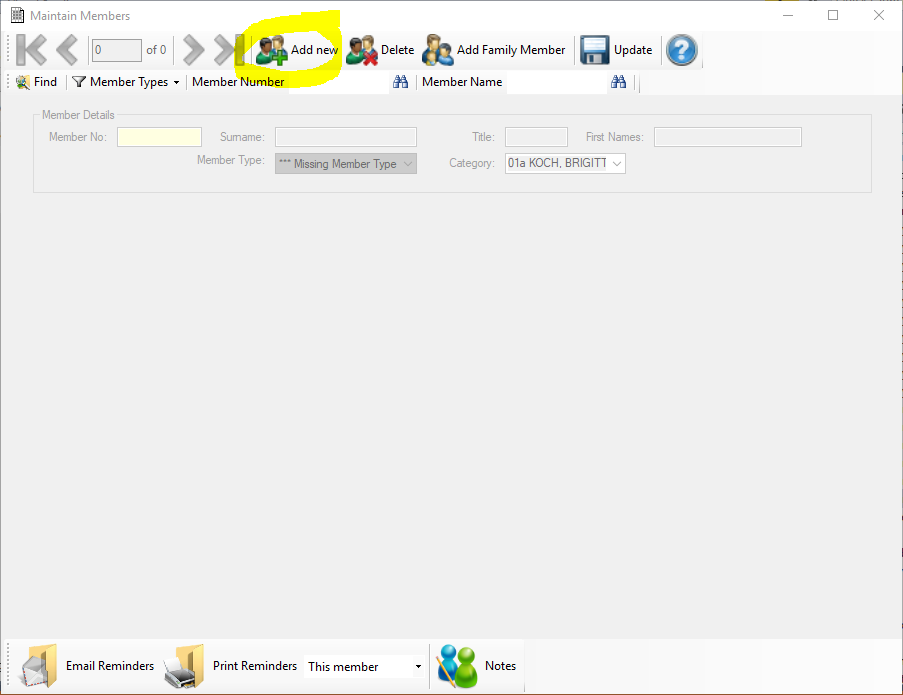
The Member Maintenance screen will show. Click the Add New button to add a new member
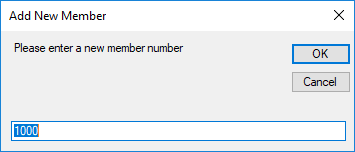
 The Member Number
Based on the Next Member Number in the Global Parameters, a new Member Number is show. You may use this number or enter a unique number that identifies the Member. Then Click OK
 Completing the Member's Details
The screen is divided in the Member details group and below that 10 tabs which cover different aspects of the Member. Fill in the 3 most important fields which are the Surname, First Names and the Member Type. The member Type that is initially selected is the Default Member Type in the Global Parameters. Use the Drop Down list to select different Member Type if necessary.
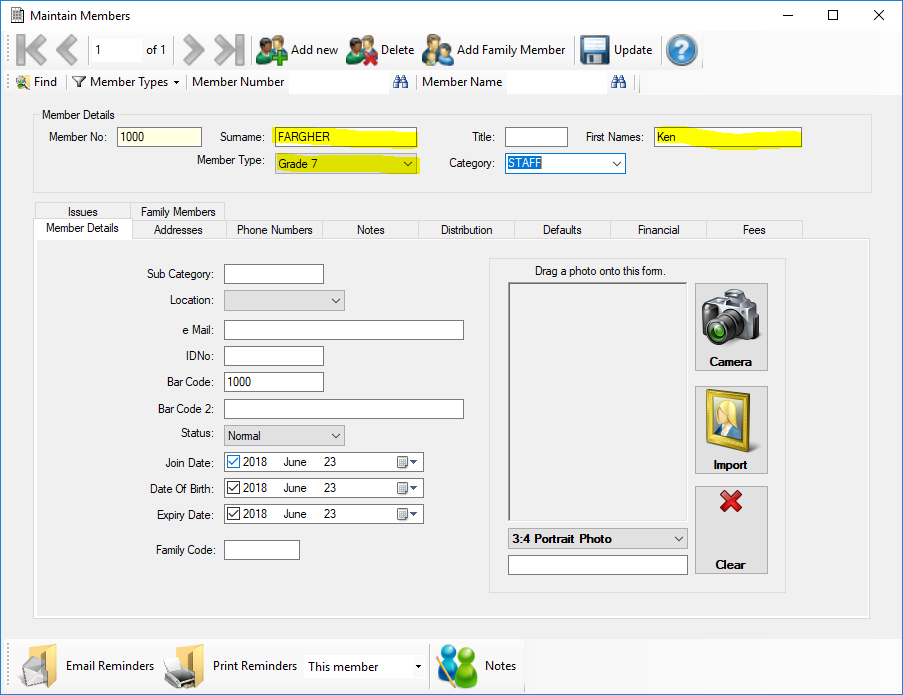
You may chose to fill in other fields as required. The Barcode field can be used as a different identifier for members. Once you have completed the information, click the UPDATE button to save the information. Further Members can be added by clicking the Add New button again
Papyrus can catalog different types of media - Books, AV Material, Web Sites, Equipment, Posters, etc. These are called Bibliographic Records. Each one is uniquely identified by a BRN or Bibliographic Reference Number
We are now going to go through the steps to add a new book
Opening the EasyCAT Screen
Click the Cataloguing button on the ribbon bar of the Main Menu to open EasyCAT
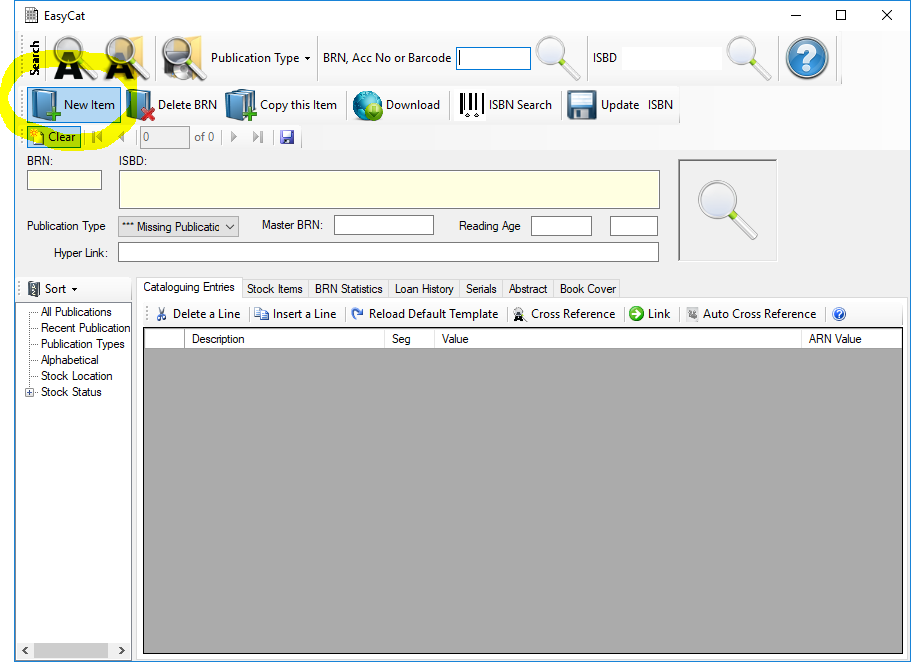 Creating a New Bibliographic Record
The BRN is only important for internal use of the Papyrus. However it is useful if you are trying to uniquely identify records. Papyrus will allocate the next number based on the Next BRN Number
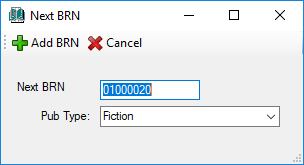
Papyrus will give you the next available BRN Number and it will show the Default Publication Type set up in the Global Parameters. Change this if you wish. Now Click OK
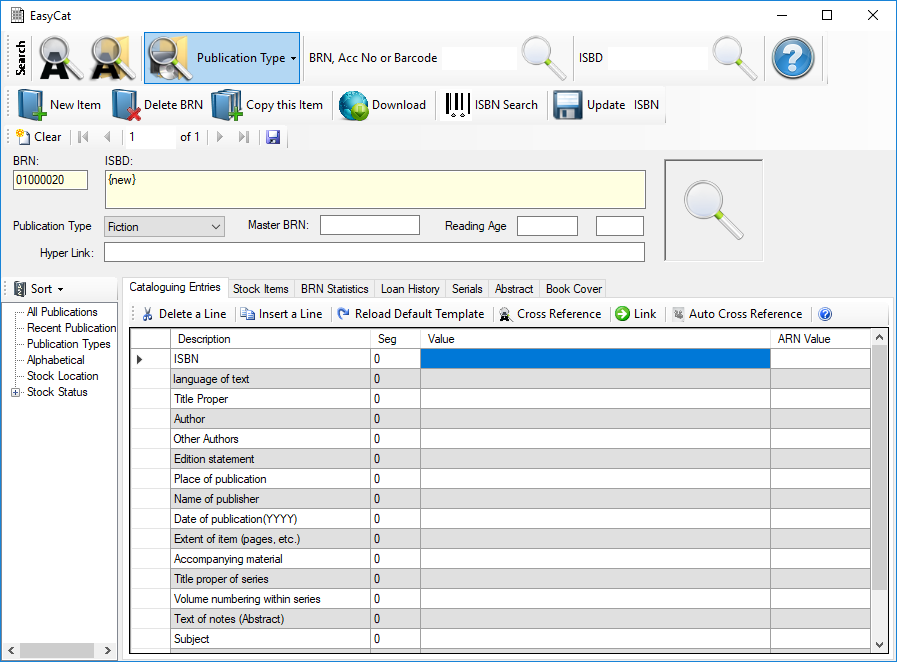
Completing the Cataloguing
A blank Template, based on the Template in the Parameters will be created. All you now do is fill in the fields. You don't have to fill in every field. The only field required is the Title Field. Once you have completed filling in the fields, click the UPDATE button. This will update the ISBD or International Standard Bibliographic Description
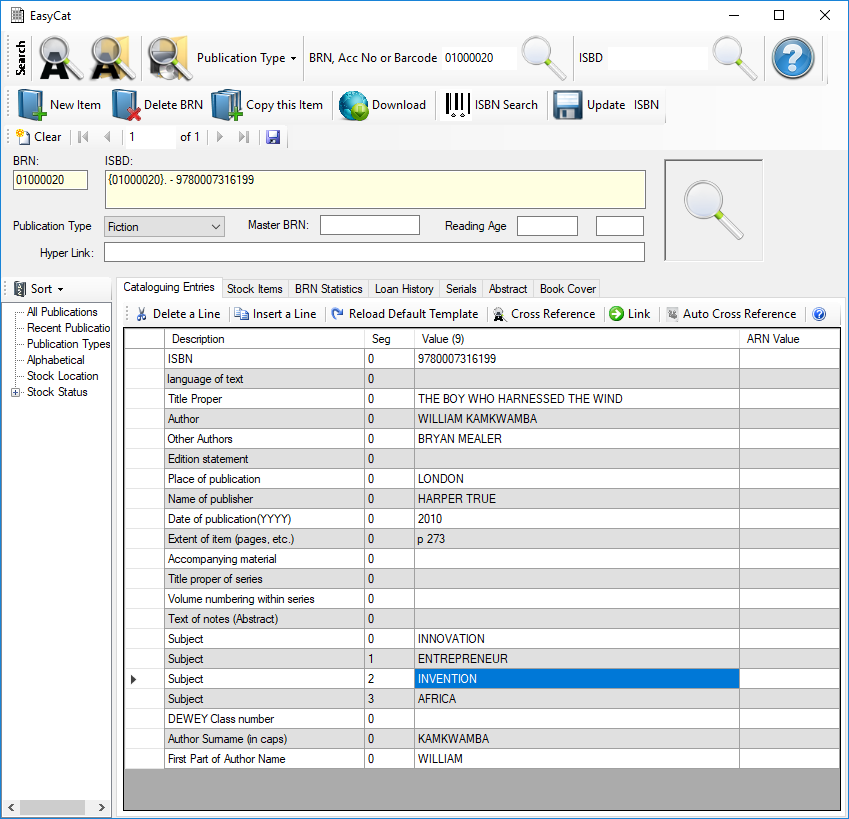
A note on Authorities
Papyrus keeps a cataloge of Authories. Simply, these include PERSONS, SUBJECTS, SERIES, PUBLISHERS and a few others that will be discussed at a later stage. Usually the 200f Author MARC code is filled out exactly as it would be on the Title Page of the book - eg Meg Fargher. However, to general an Authority, the 700a (Author Surname) and 700b(First Part of Author Name) should have FARGHER and Meg respectively. You can do the same with the Publisher and Series MARC Codes.
To Cross reference this book with other books with the same Author, Publisher or Subjects, etc, click the AUTO CROSS REFERENCE button
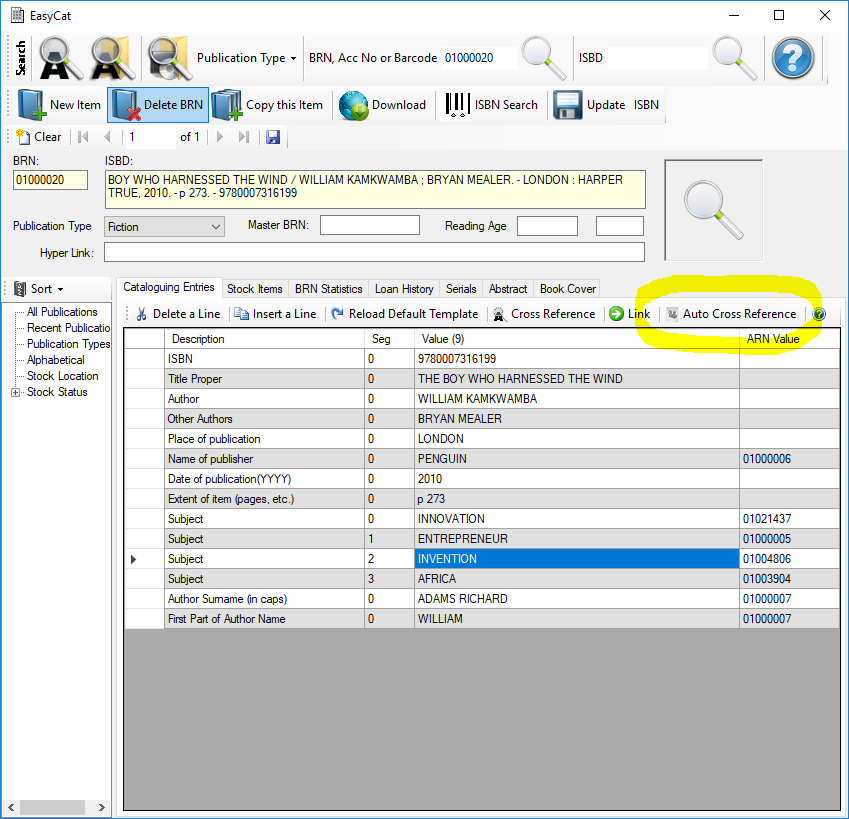
Each Bibliographic record can have one or many related Stock records saving the time required to catalog each one seperately and keeping them in a logical group
Now you have catalogued the Bibliographic Record. Now we deal with the physical STOCK. You may have several copies of the same book. Each copy will be captured against the BRN. Each stock item is uniquely identified by an Accession Number and in addition a Barcode Number On the window, select the tab STOCK ITEMS
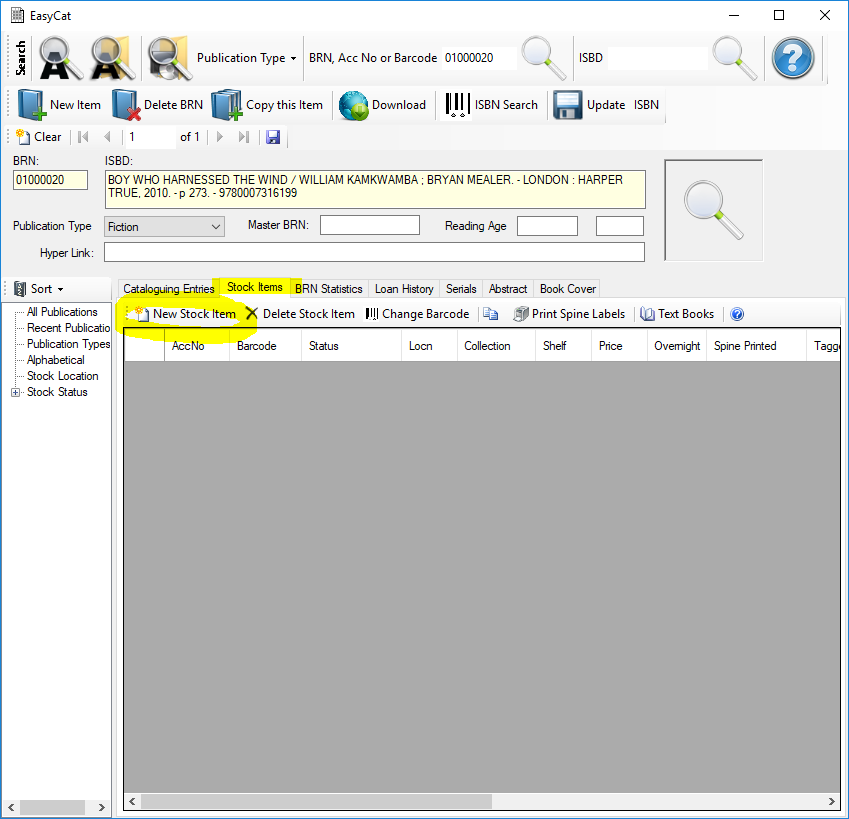
To add a new stock item, click the ADD NEW STOCK ITEM button
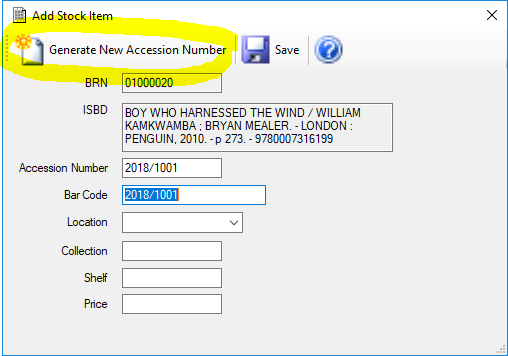
You can either enter your own Accession Nuimber or have have Papyrus allocate a sequential one automatically by clicking the GENERATE NEW ACCESSION NUMBER button. The cursor will now be waiting at the Barcode Number and is ready for keyboard or scanner entry. The Barcode is set to the accession number. However both must be unique in the system. If you have a unique barcode, you can type it in or use the scanner to scan it in. Other relevant information is the Physical location of the book. Papyrus has three levels, Location, Collection, Shelf. At this stage only use Shelf. Location is only used in Libraries with seperate branches or locations.
Click the OK button once you are complete. The details will be added and shown as a table.
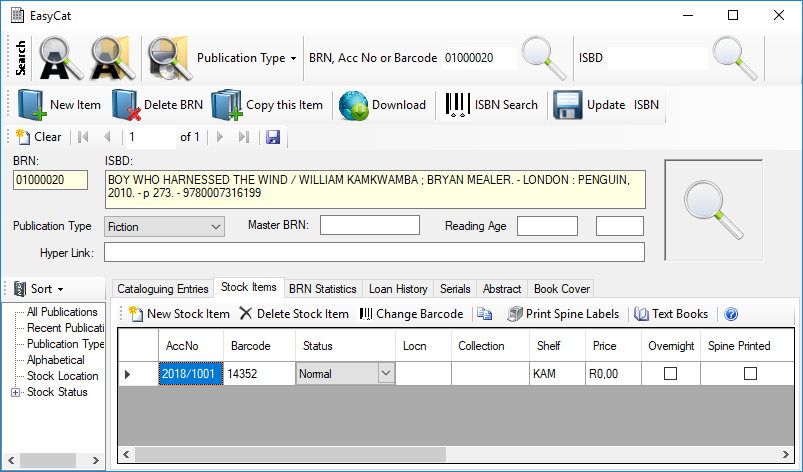
We are now ready to issue this stock item to the member. If you barcoded the book, we can use that number, otherwise write down the Accession Number in the inside cover of the book
Now that a Member has been created and a book catalogued with physical stock, we will look at how we use the Front Desk screen to select the member, select the stock item and issue it to the Member
Opening the Front Desk Screen
On the Main Menu, click the Front Deskbutton. This will open the Front Desk window.

Seleting the Member
The cursor will be waiting at the Number field in the Members details section. There are two options for selecting a number. Either their member number or barcode is scanned or the librarian can find the member using their name. Type in the Member number that was used in the first step and press the RETURN or ENTER key on the keyboard. If the number is correct, the Member's details will be shown
If you wish to find a member by name, use the FIND button
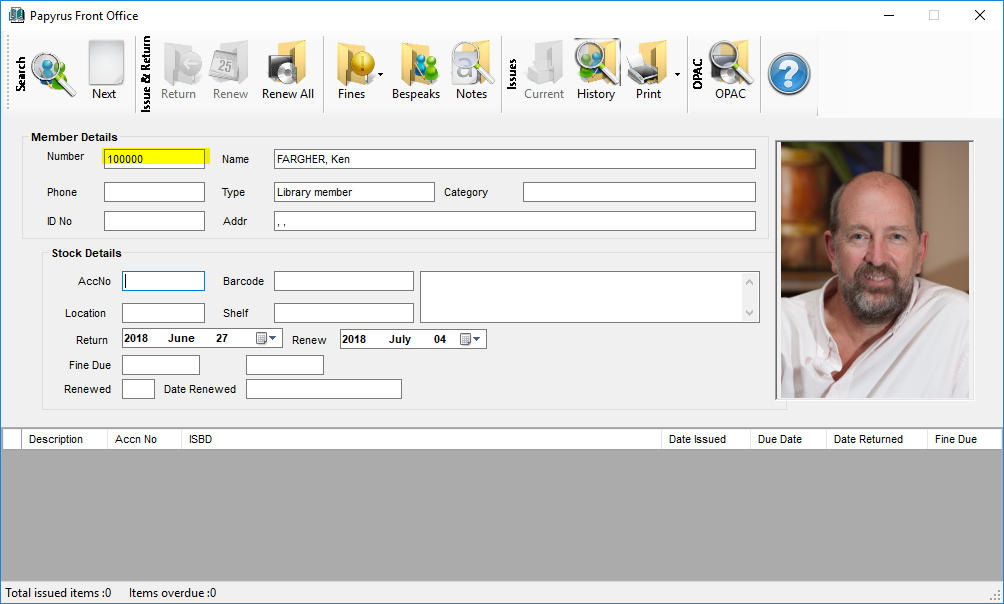
Selecting the Stock
After selecting a member, the cursor will be waiting at the AccNo or Accession Number field. In this field, either the Accession Number or the Barcode of the book is typed in or scanned. Type the number used in the Adding Stock step and press the RETURN or ENTER key on the keyboard. If you are using a scanner, scan in the barcode number. The scanner shopuld be programmed to send a Carriage Return after each scan
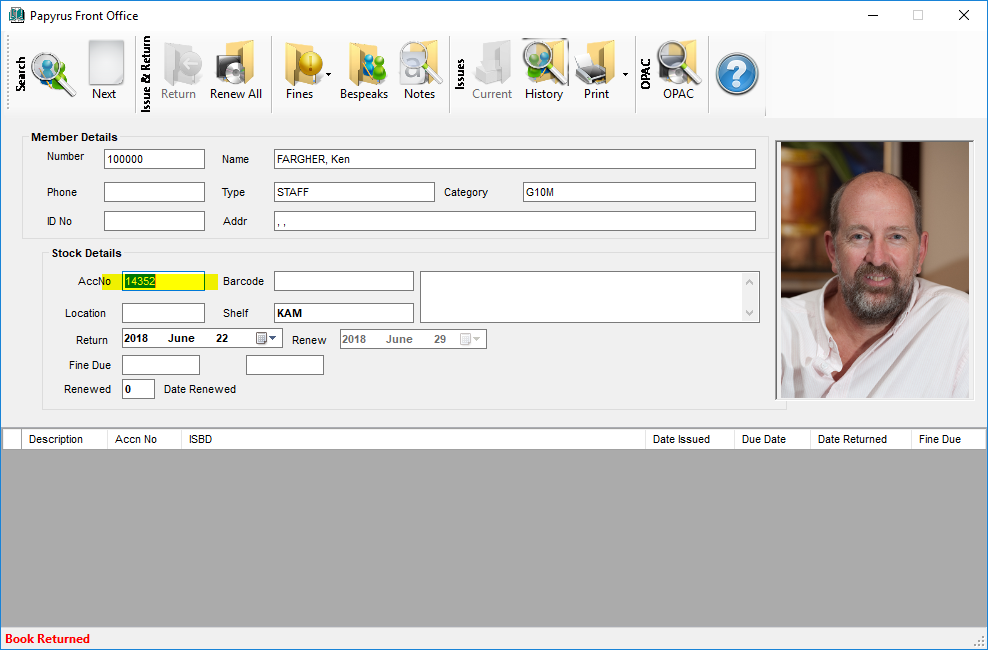
The Bibliographic details of the stock item are displayed
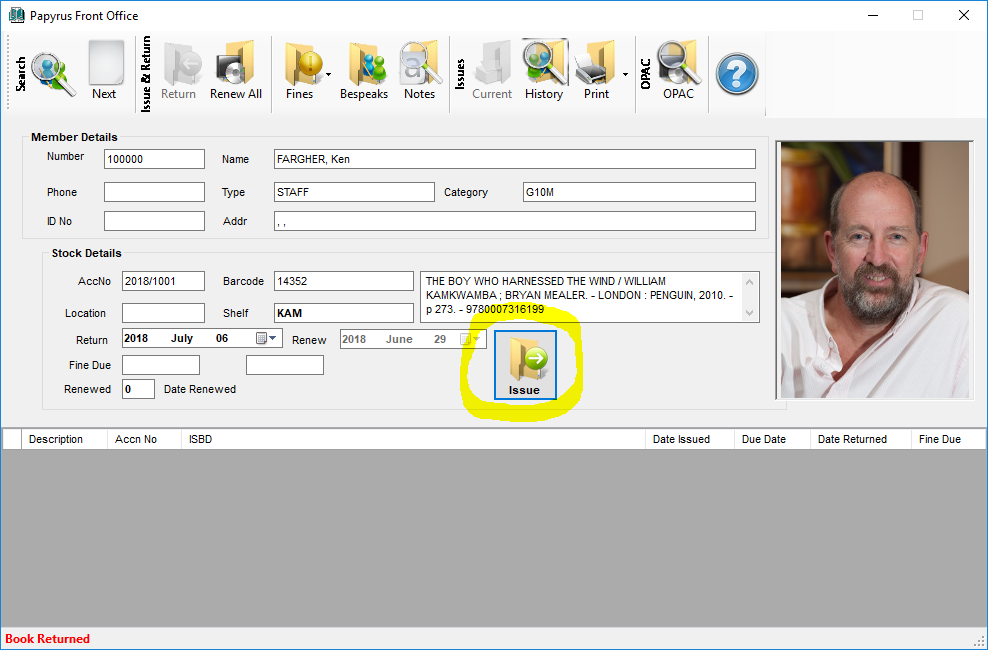
Issuing the Book
The ISSUE button will now have the focus. The Return Date is calculated. You can now press the RETURN or ENTER key on the keyboard or click the ISSUE button. The book will then be issued and the details show below in the table of books issued to the member
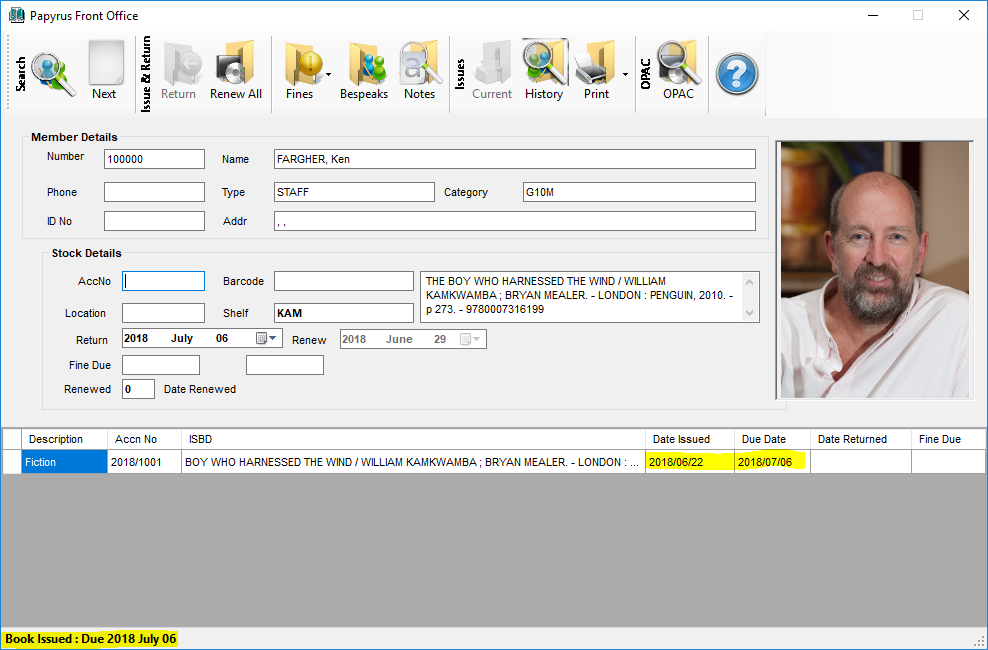 Returning the book
Books that have been issued are returned in the same way. Type the number used in the Adding Stock step and press the RETURN or ENTER key on the keyboard. If you are using a scanner, scan in the barcode number. The RETURN button will now have the focus. The Fine is calculated if it is overdue. You can now press the RETURN or ENTER key on the keyboard or click the RETURN button.
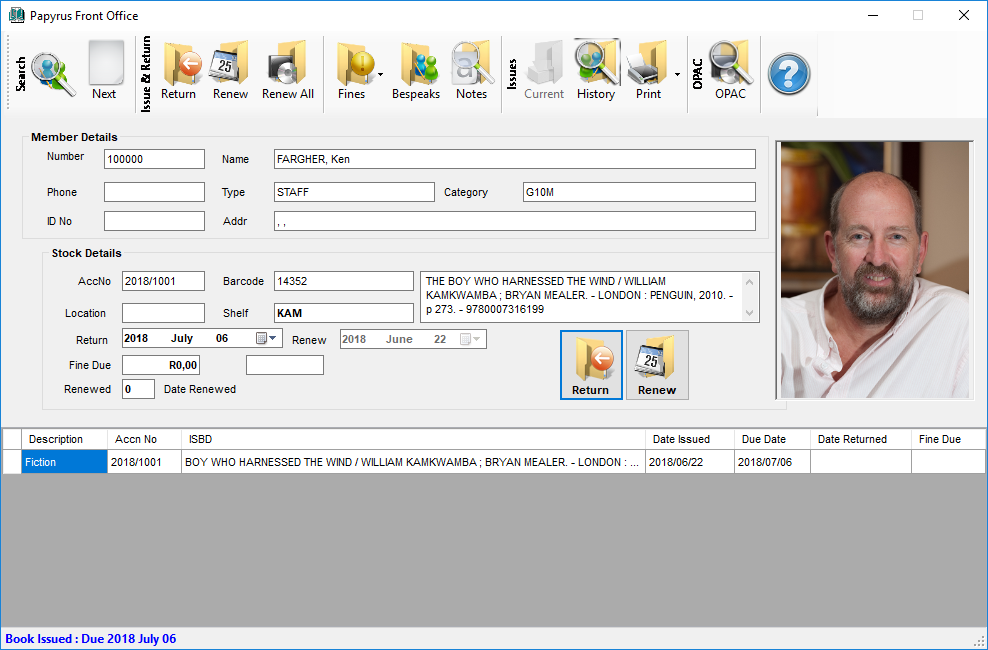
The book will then be returned and will be removed from the details show below in the table of books issued to the member
You can click the HISTORY button on the ribbon bar to show the history on the member
You have now completed all the basic steps of Issuing and returning a book that you created to a member that you created!